This article explains how to set up a live stream using Vimeo, as an event in ReAttendance. With a live stream embedded you can then make it public, restrict it so that it can only be watched by your attendees or even monetise the event by selling tickets to it...
Reattendance is the best place to monetise your event with a live stream using Vimeo as the stream is stable, has live chat enabled, which can also be embedded in the Reattendance event, and has the facility to lock down sites which are allowed to embed the stream, meaning that (unlike YouTube) the live stream cannot be shared, leading to lost revenue.
Vimeo also automatically converts the live stream to an embedded video once the stream has ended using the same embed code, which means that your attendees, or those who have paid to watch, can re-watch the video on-demand after the event.
If your event gets cancelled – this is a perfect option to host a virtual event.
Part 1 – Setting Up the Live Stream Using Vimeo
Let’s look then first at Vimeo.
To be able to live stream in Vimeo you will need a Premium Vimeo account. Although this does cost you, there is a 30-day free trial and if it’s making you good money, it’s worth keeping!
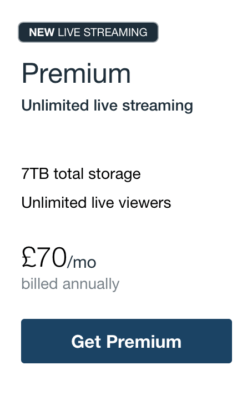
To get the 30-day free trial, which is not listed on the website, sign up for a free Vimeo account, and then go to the Upgrade link (above) while you’re logged in. Vimeo will then sent you a 30-day free offer!
Once you’re in your Premium account you’ll need to do the following to set up the live stream using Vimeo:
Create the Live Stream Using Vimeo:
- Log into your Premium Vimeo account. Navigate to the home page by clicking the Vimeo logo.
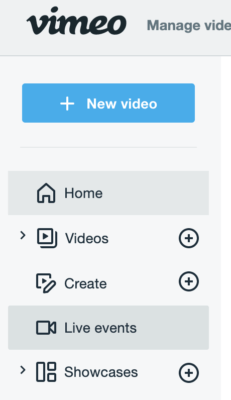
2. Click the Live Events link in the image above, and you’ll get the following screen:

3. This shows all live events you currently have setup and the option to add more. Click the Create Live Event button. You’ll get the resulting popup where you can enter the details of your live event:
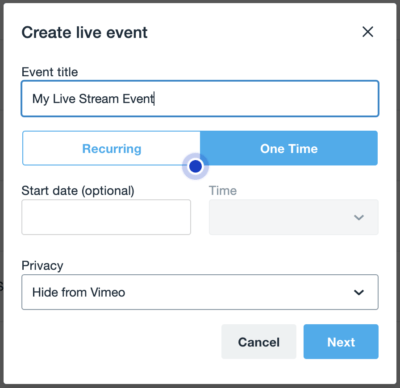
Important: At this stage you need to ensure that you “Hide this event from Vimeo.com” in the Privacy pulldown. If you don’t do this, anyone will be able to view this live stream directly on the main Vimeo website!
4. We’re now presented with another popup to enter in more details for the live stream using Vimeo.
Now let’s turn on Chat with the radio button option, and in the last section of the popup window, select “Only on sites I choose” and type in reattendance.com into the domain field and click the + button.
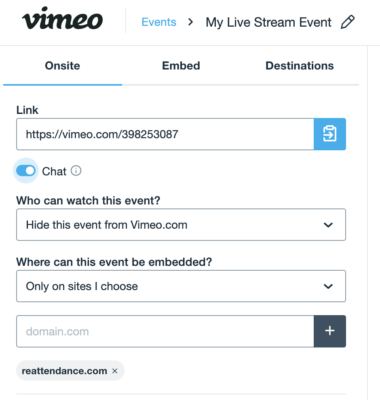
Important: selecting the above options and restricting the embed domain to Reattendance means that your live stream cannot be shared anywhere, and therefore once embedded into ReAttendance can be made public with your livery, restricted to your attendees only, or monetised using our shop and ticket sales.
5. Now we’ve created the live event in Vimeo, we need to copy the embed codes for the live stream and the chat stream, ready to embed into the Reattendance Player later. Click the Embed tab in the popup window:

…choose your options and then click the Event Embed Code button:
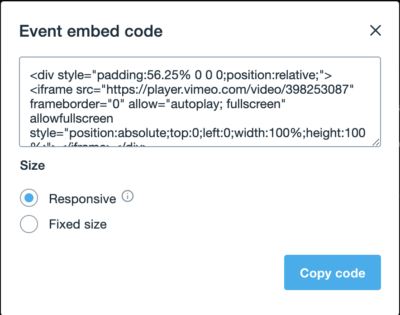
Important: Make sure that the sizing is set to Responsive rather than Fixed.
6. Copy the code for later use in Reattendance.
7. Now close the Event Code window and click the Chat Embed Code button:
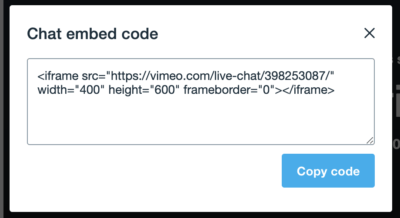
…again, copy the Chat Embed code for use in Reattendance.
That’s it! You’ve setup your live stream using Vimeo! Now to set up Reattendance.
Part 2 – Embed the Live Stream into Reattendance:
Having set up the live stream using Vimeo, we now need to create our Event. Whether you want to create a Full Event with a hierarchical structure (as detailed in the Tutorial in the Event Owner dashboard), or whether you want to create a standalone Player, the process for embedding the live stream using Vimeo into Reattendance is the same.
- Create a new Player. It’ll look something like this once you’ve created it:
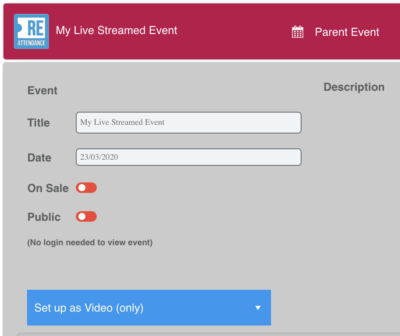
…now click the Set Up as Video (Only) pulldown and you’ll get these options:

…click the last option, Embed Live Stream / HTML Code, and the screen will change to this:

…The Player is now set up as a Live Stream type and is ready to accept the embed codes we copied from the live stream using Vimeo earlier. Paste these in now:
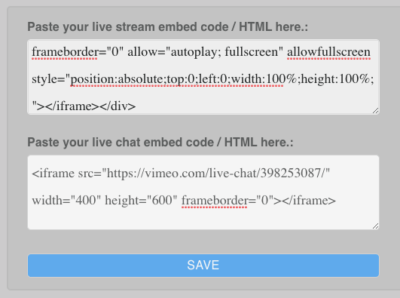
…click the Save button. You will see that both the Embed Live Stream and the Chat Live Stream have now been created and the Preview button is now active:
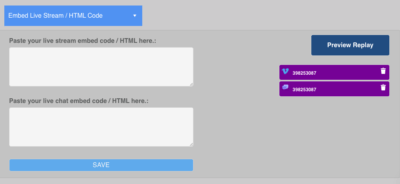
and if that’s unclear, let’s zoom in to the area we’re talking about:
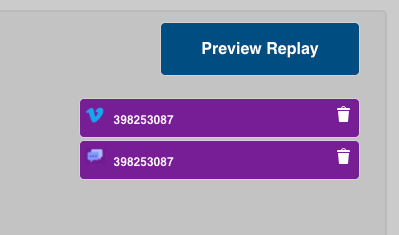
You have one entry for Vimeo and one entry for the Chat. Click the main Save button in the Player. If we now go and Preview the Player it will look something like this:
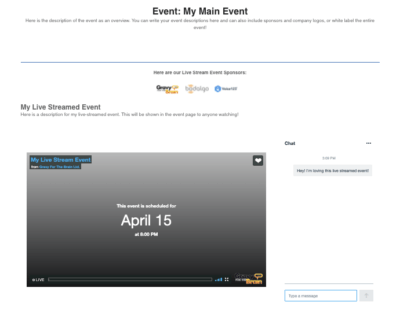
That’s it! We’ve embedded the live stream using Vimeo into our Player! So what’s next?
From here we have three options depending on how you want to run your Event in Reattendance.
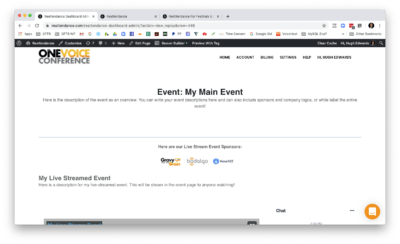
- Option 1 – Make the event public. If you’re on our Pro plan or above you can make the event public. This raises a question though – why bother restricting the live stream to the public on Vimeo if it can be just made public on Vimeo? The answer is one of branding – here’s how the event might look if you whitelabled the entire event and added in your Sponsors, which is much more preferable/professional than just having the Vimeo homepage:
- Option 2 – Send access to your attendees. It might be that you don’t want to make the event public nor monetise it, but rather assign access to this live stream using Vimeo to your attendees – be they festival ticket holders, educational cohorts, corporate employees or theatre ticket holders, you can now go and assign your Attendee Groups to these events (as per the Tutorial in the Event Owners Dashboard).
- Option 3 – Monetise your Event. Now that your event is in Reattendance, you can monetise it by selling tickets to your event. This is one of the most powerful features of Reattendance and allows businesses of all sizes, musicians, festivals, educational facilities, corporate companies and many more to monetise both their back catalogues of event recordings, and also their future live streamed events. Here’s how:
Part 3 – Monetise your Live Event with Reattendance:
Ok! You want to monetise your live event.
(Reattendance takes 20% commission for providing the marketplace and sales mechanism for your tickets, leaving you with 80% of all ticket sales. These ticket sales can be pushed directly to your accounts and we provide full invoicing and sales reports of any events sold.)
- Firstly then, let’s set your Player for sale (NB this is the same process if you have a full hierarchical live event structure):
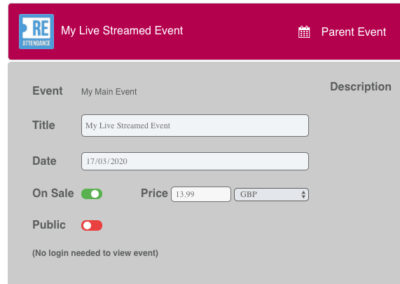
As you can see in the above image, we’ve opened the Player, clicked the On-Sale option and then filled in the price we want to sell the event for – this price is completely up to you. Then Save your Player.
NB: The Player is not yet listed on the Event Marketplace!
Bear in mind that when using a live stream in Vimeo, anyone who has access to the Live Event Player, (either if it’s set to Public, or given access to Attendees, or monetised in the Events Marketplace) will also have access to the post-event recording that is automatically created by Vimeo.
2. Next we need to edit the description that will be seen in the Event Marketplace store when someone purchases a ticket and set the event to be Published:
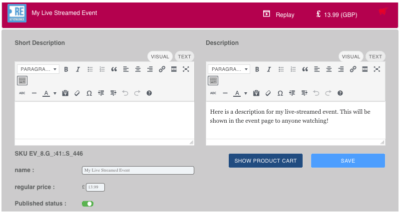
You will notice that the bottom option, Published Status, has been set to green – when you do this you’ll get the following warning:
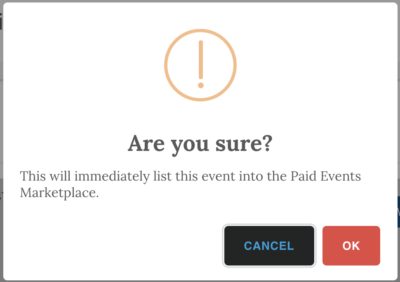
…obviously only set the event to be Published when you’re absolutely ready to!
3. Click Save – and you’re done!
Part 4 – View your Live Event in the Event Marketplace:
If you go to the main site and are not logged in, you can get to the Events Marketplace:
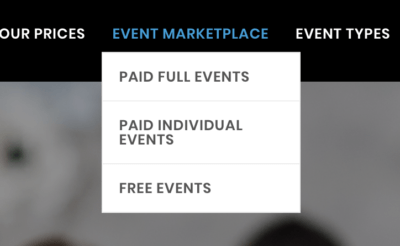
Depending on whether you’ve used a full hierarchical event structure, or created the Player as just an individual event, your event will be listed either in the Paid Full Events menu or the Paid Individual Events menu.
You’re done and are now selling your event! To see how many sales you get, just log into your Event Owner Dashboard and click the My Shop Sales link.
Good luck with your event!


