In this tutorial, we’re going to look at how you can quickly activate Breakout Rooms for your Zoom meetings...
Breakout rooms are a great way to split up your attendees in a Zoom meeting, so that they can form smaller and more intimate groups within a single Zoom meeting.
If you are unable to find the breakout rooms feature in Zoom, then this walkthrough will help you discover it so you can drastically improve the socials and workshops that you host within Zoom.
Note: breakout rooms are only available for Zoom meetings and are not available in webinars.
Tutorial: How To Enable Breakout Rooms For Zoom Meetings
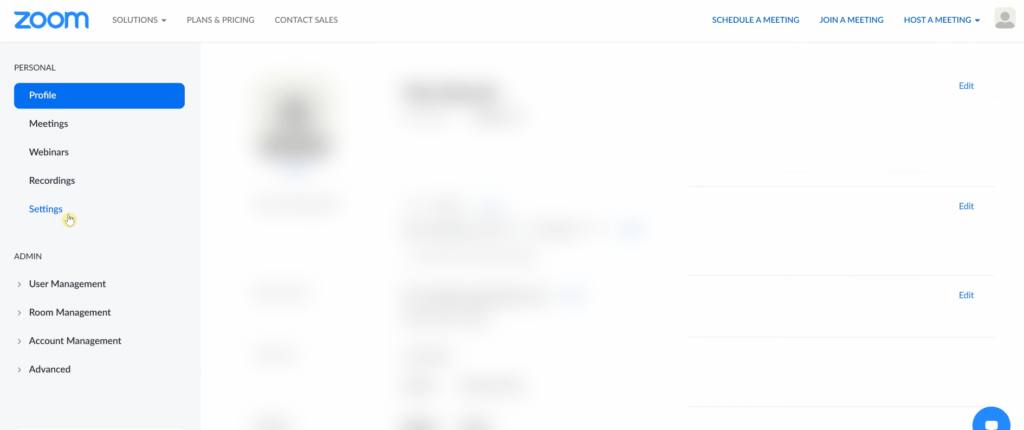
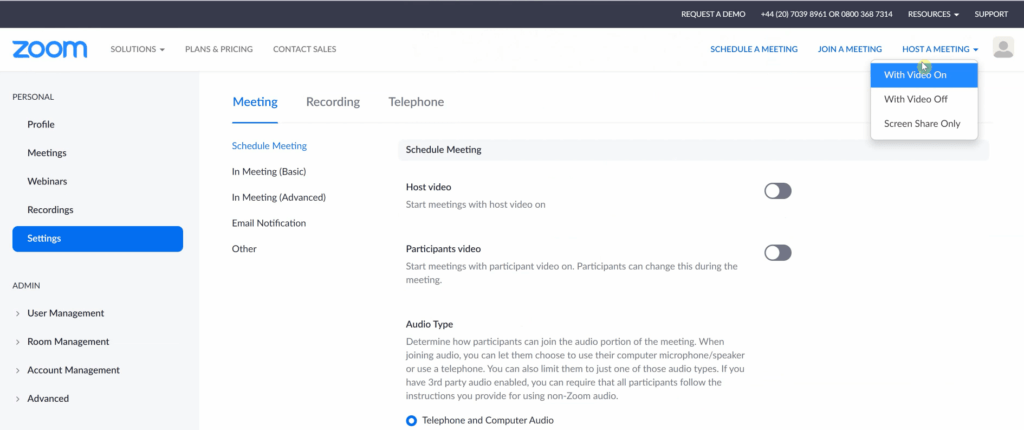
Step 1: Head over to Zoom and sign into your account. Once you’re in your Zoom dashboard, you’ll need to head to your “settings”, which can be found in the sidebar on the left hand side of your dashboard.
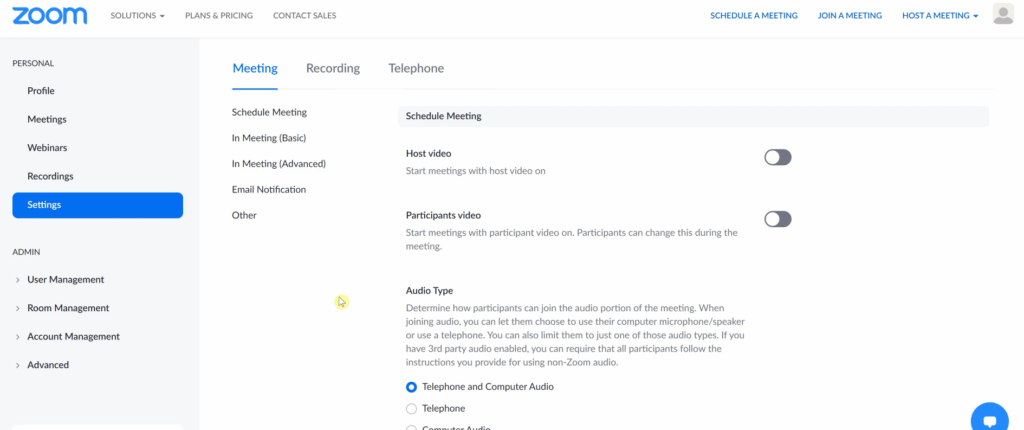
Step 2: Once you’re in your settings, make sure that you are in the “Meeting” section and then begin scrolling down.
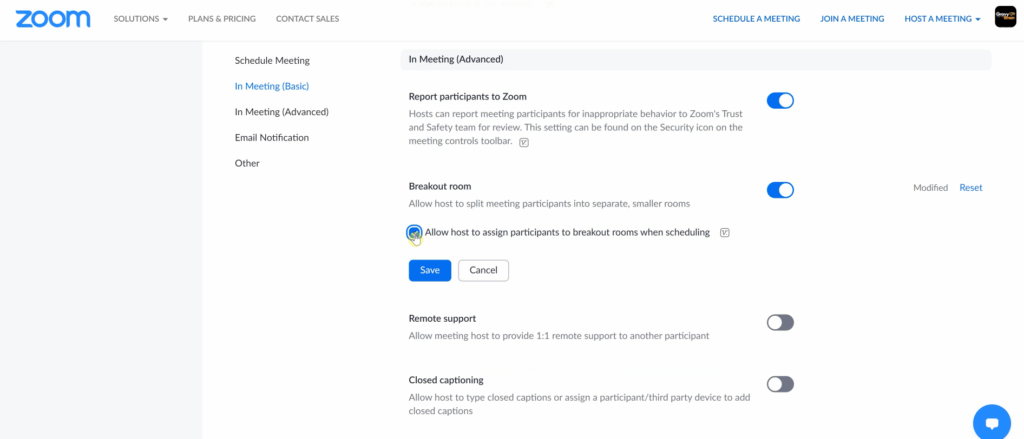
Step 3: You’ll then need to scroll quite far down the page, until you hit the “In Meeting (Advanced)” section. “Breakout Rooms” will be just below the start of this segment. When you reach Breakout Rooms, toggle the option so that the toggle turns blue.
If it is already blue, then your breakout rooms are already activated and you can jump straight to the next step.
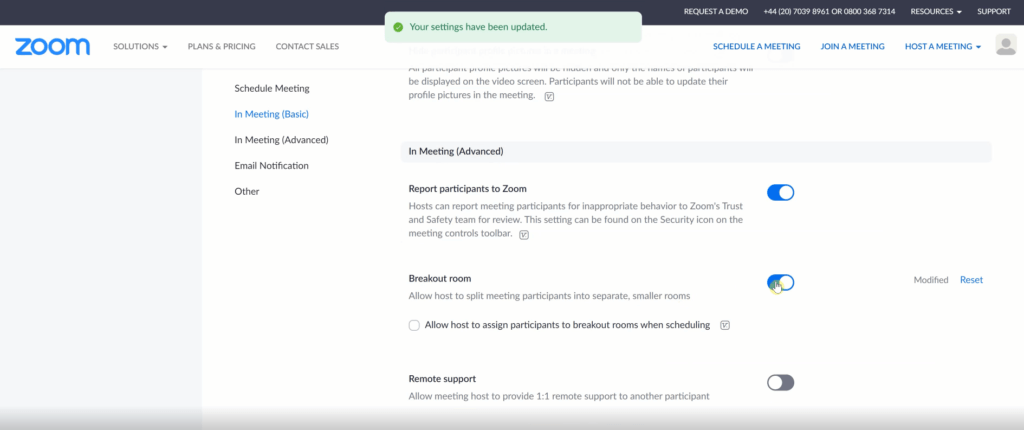
Step 4: An additional option will appear below, asking you if you want to “Allow host to assign participants to breakout rooms when scheduling”.
This extra option simply allows you to pre-assign all your attendees to specific breakout rooms, so that when they enter your Zoom meeting, they will go straight into a breakout room and bypass the main lobby. This option doesn’t have any disadvantages, so you should activate it to give yourself more control over your breakout rooms, but we will not be going into how this aspect of the breakout rooms work in this tutorial.
Step 5: In order to test this, you should then start a meeting. The quickest way to do this is in the navigation menu in the top right hand of the screen where it says “Host A Meeting”. You can host a meeting with or without video on for the test.
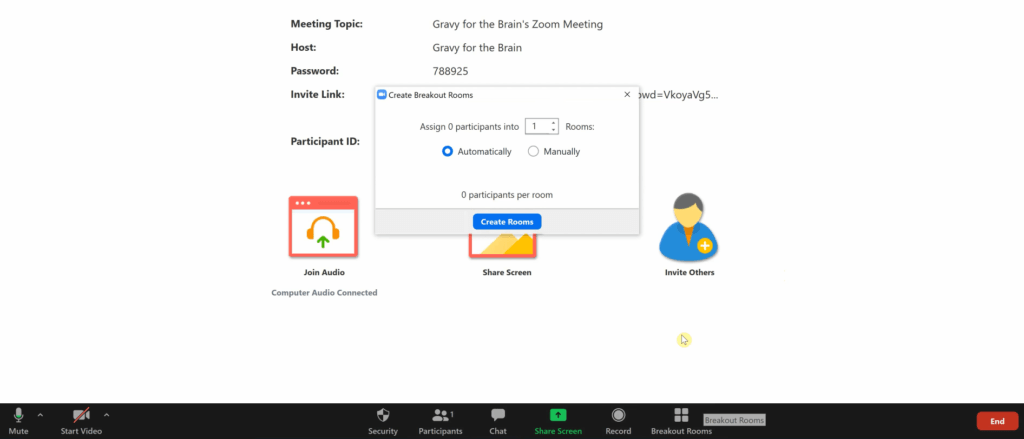
Step 6: Once you’re in your meeting, you will now find that in the bar at the bottom of your Zoom meeting dashboard, that a new option has appeared alongside your usual “participants” and “chat” options.
You will see “Breakout Rooms” is now an option. When you click it, you will bring up your breakout room options.
Success! You have now enabled Breakout Rooms in your Zoom meetings and are ready to start hosting meetings using breakout rooms to create more controlled and focused socials and workshops.
Feel free to check out more of our tutorials to help you learn all there is to know about hosting a successful virtual or hybrid event using ReAttendance.


