A Zoom Webinar is an easy way to host a panel, Q&A or as the name suggests, a webinar, as part of your virtual event...
However, in order to use Zoom Webinars on ReAttendance, you will first have to upgrade your Zoom account.
Webinars are unique compared to Zoom Meetings because they allow only pre-selected hosts and panellists to share their audio and video feeds. Any other attendees will only be able to use the chat feature, ask questions through text and share their video and audio when they are given permission.
Webinars are a simple way to broadcast on Zoom, without having to worry about your audience taking away focus from your main hosts.
In this quick tutorial, we’ll show you exactly what you need to do in order to activate Webinars in Zoom.
Tutorial: How To Activate Webinars In Your Zoom Account
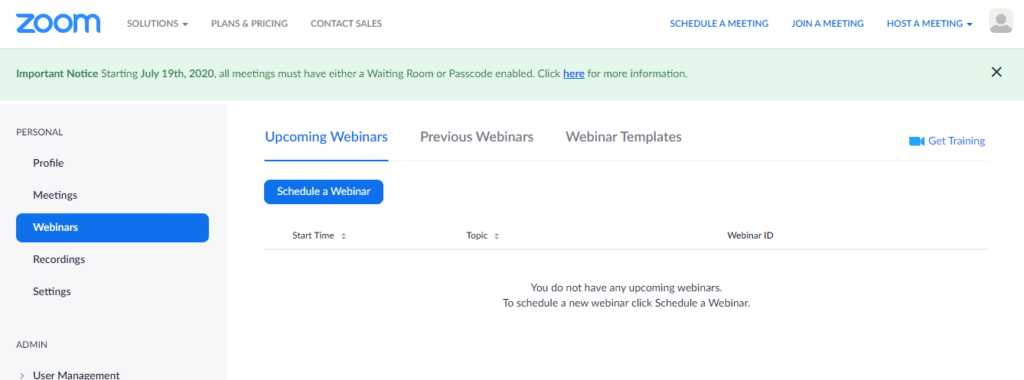
Step 1: Head over to Zoom and sign into your account. Once you’re in your Zoom dashboard, you’ll need to head to your “Webinars”, which can be found in the sidebar on the left hand side of your dashboard.
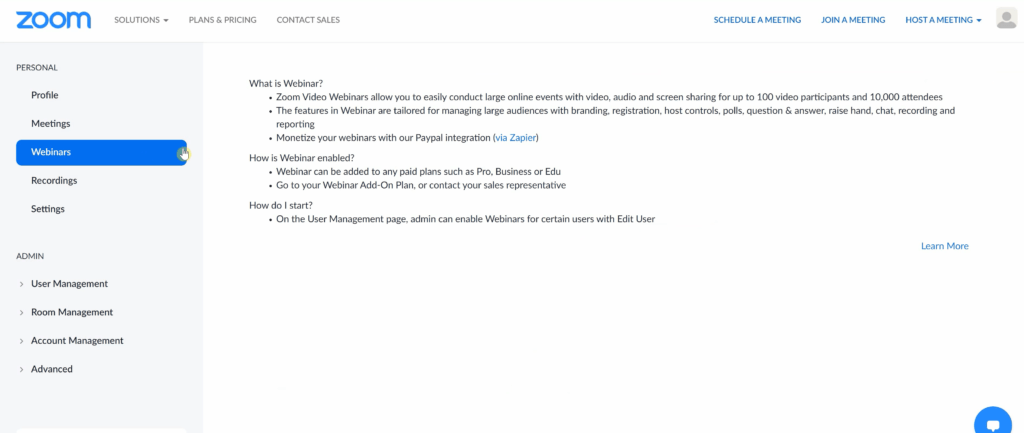
Step 2: You will notice that you are unable to edit or create any webinars because the feature is not available. If you are able to do so, then you are already set up with webinars.
However, if your webinar area looks like the image below, then you should head to “Plans & Pricing” in the header in order to upgrade your Zoom account to activate the webinars feature.
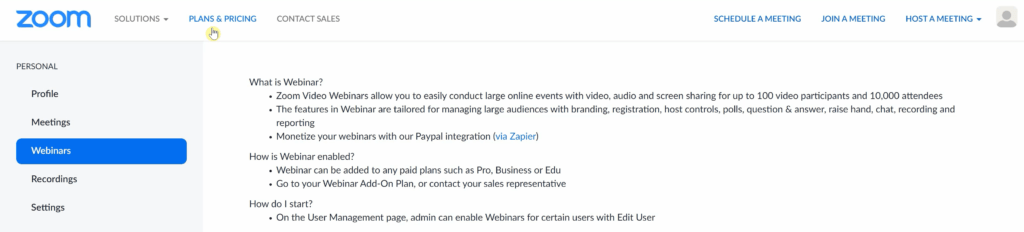
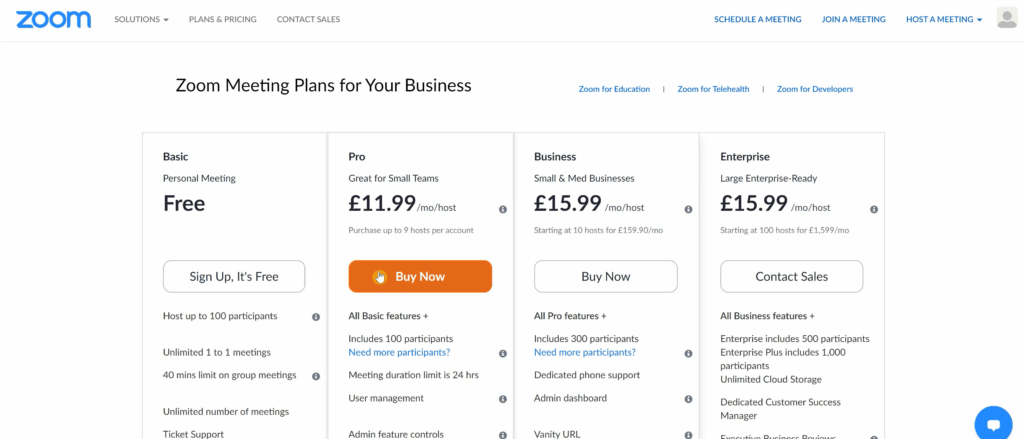
Step 3: In the “Plans & Pricing” options, you’ll be provided with 3 tiers of membership. Webinars are availble for plans that are “Pro” and above. If you are already a Pro member, then you can skip to the next step, but if you are still on a Free membership, then you will have to upgrade.
You can upgrade to “Pro” as your minimum upgrade as that is all you need for webinars. Select “Buy Now” to continue to the next step.
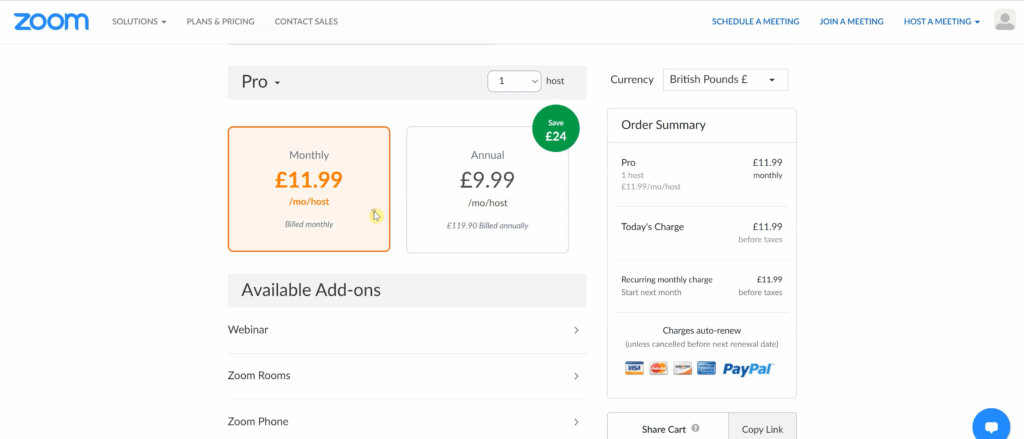
Step 4: In the “Pro” purchase screen you can choose to pay for your membership on a monthly basis or a yearly basis. Yearly provides you a discount overall, but monthly allows you to cancel your membership at any time which is better if you only plan on hosting a single event in the near future. In the example, we’ve chosen monthly.
However, do not purchase at this point, since even though you have upgraded, you will still not be able to use webinars.
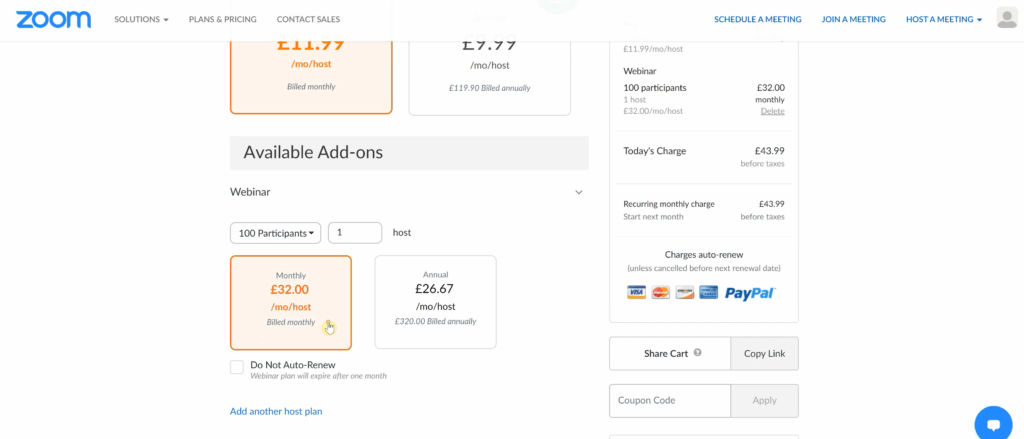
Step 5: Scroll down to the “Available Add-ons” section and you will see an option to add “Webinars” to your purchase.
You must also purchase the webinars add-on in order actually use webinars.
As before, you have the option of paying monthly or yearly. Once again we will select monthly as it gives us the option to cancel and restart the subscription only when we are actually hosting events.
You will also be given the option for how many “participants” you want to be able to join the webinar at a time and also how many “hosts” you want to be able to have on each webinar.
Select a participant number that you feel is realistic. You will only ever need 1 host selected. A host simply means users who have the power to actually control the webinar settings. It does not refer to how many panellists you can actually have on the webinar at any one time, so you just need 1 host in order to start and run a webinar with as many guest panellists as you want.
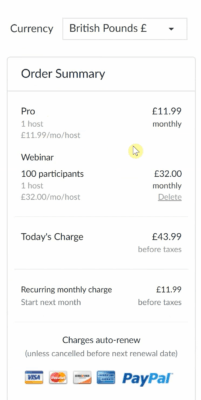
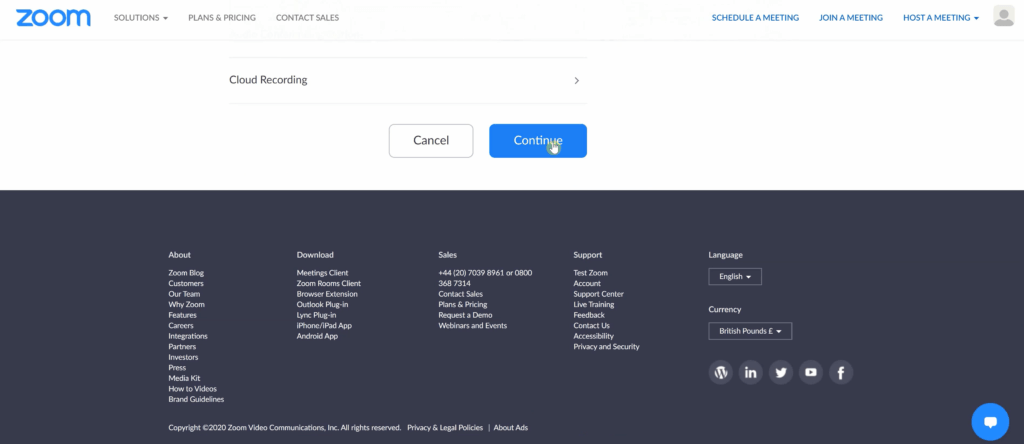
Step 6: Once you’ve selected both your “Pro” subscription and your “Webinar Add-on”, you’re now ready to review your final purchase which will be displayed on the right hand side of the screen. It should look something like the below image, so make sure you’ve purchased the correct items and upgrades.
If you make a mistake, you can always go back and purchase any add-ons you need again at a later date.
Step 7: Once you are happy with your order, then simply scroll all the way down to the bottom of the page and click the “Continue” button, which will take you to the payment screen to complete the payment.
Step 8: Congratulations you have now successfully upgraded your Zoom account and can use webinars.
Simply head back to your “Webinar” menu from “Step 1” of this tutorial and you’ll now find that webinars are available to schedule and edit.
If you can’t see this, then run through this tutorial again and double check you have followed the steps correctly, or simply get in touch with Zoom’s help centre directly on their site to diagnose the issue.
Feel free to check out more of our tutorials to help you learn all there is to know about using Zoom or any other aspect of ReAttendance to host incredible talks, panels and socials.